# Setting up Firebase
### Setup and Create Firebase Project
since this app was built using Firebase ,you have to create a New Project on Firebase by going to [Firebase Console](https://console.firebase.google.com/) then sign in using your google account if your'e not signed in , then create a new Project and set the name you like for the project
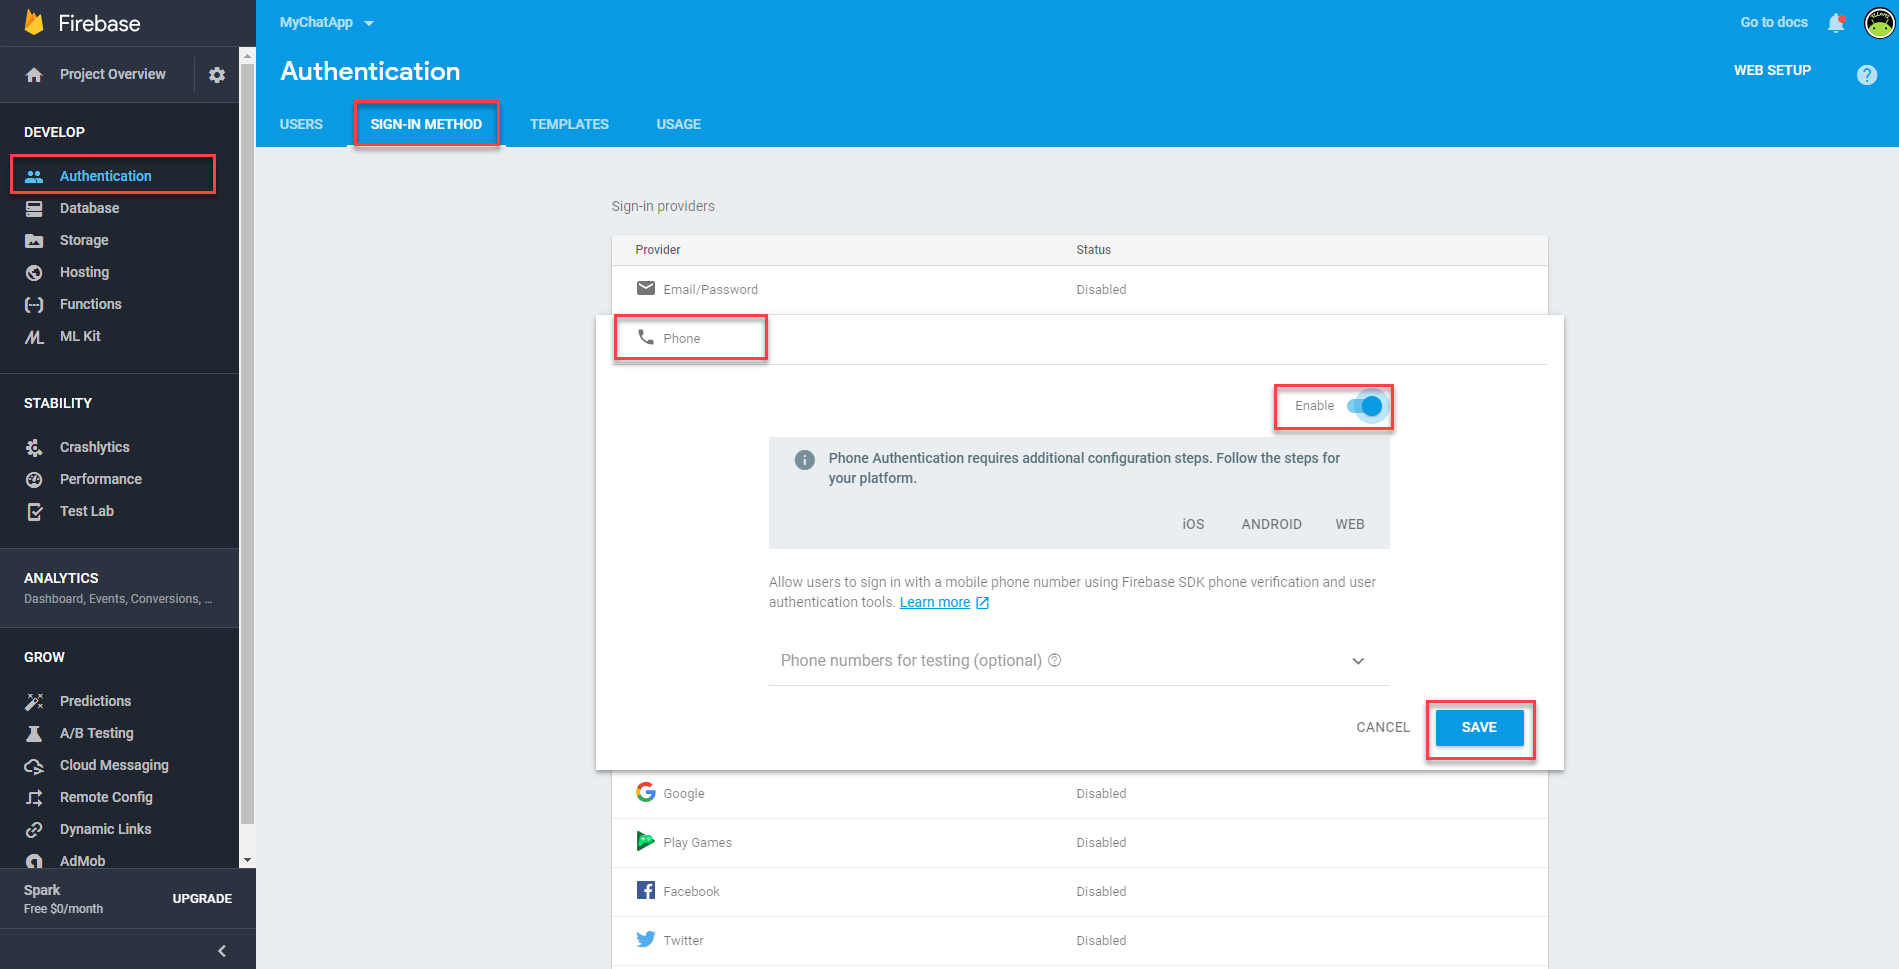
### Enable Phone Authentication
next up you have to Enable Phone Authentication in Firebase Console by going to :
* Authentication
* Sign-In Method
* click on Phone
* enable it then save
{% hint style="warning" %}
Also enable Google auth provider by same way. If not enable you will face authentication problem after upload app to Google Play Store.
{% endhint %}
### Uploading Default Images
{% hint style="warning" %}
if you did not upload these images you will see an error while registering after confirming your phone number
{% endhint %}
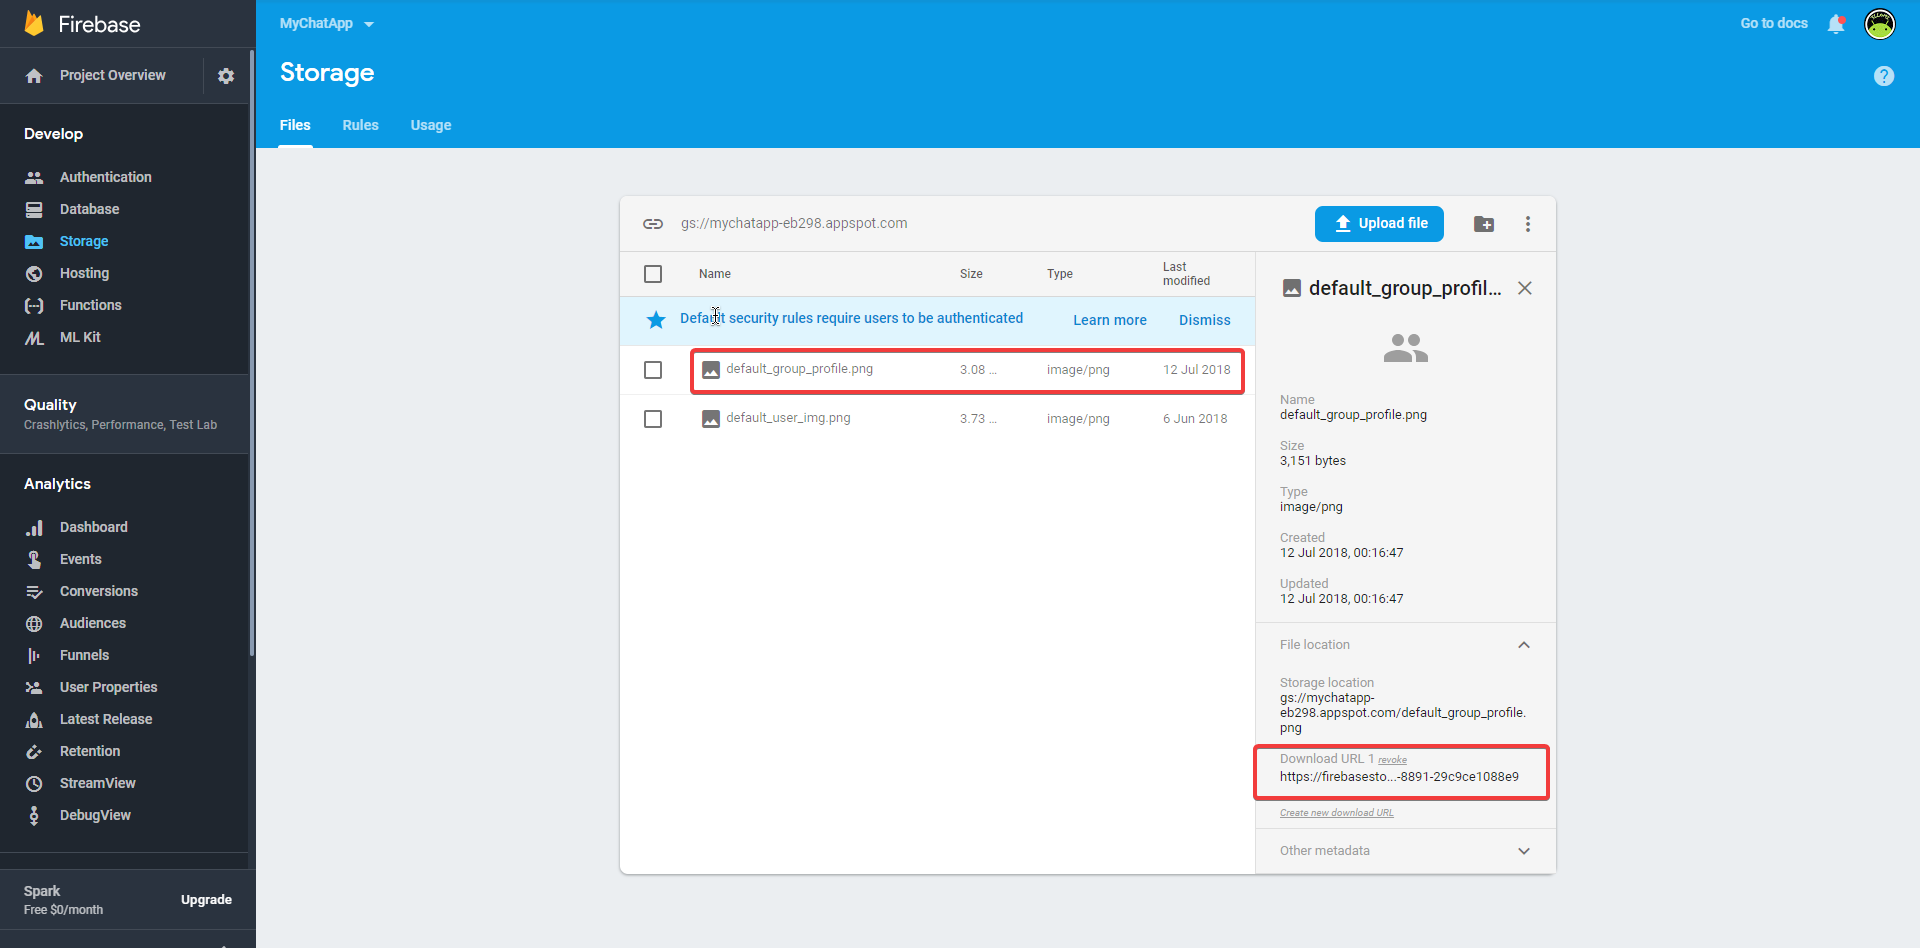
now you have to upload the default user image, this image is used by default when a user registered in the app for the first time and he did not pick a Profile image.
to do that go to Firebase Console > Storage then click on Upload File. you can upload your own default user profile photo or you can upload the included image in `Firebase Console - Files\default_user_img.png`
after uploading, click on the uploaded image > Expand File Location > click on `Download URL`. this will copy the uploaded url to save it in Database later.

go to Database and add a new node by hitting the little plus icon

(choose Firebase Realtime Database if prompted)
then type the key name: `defaultUserProfilePhoto` and paste in the copied url as the value . like This
now we have to do the same thing for `defaultGroupProfilePhoto`: upload your image or upload the included image in `Firebase Console - Files\default_group_profile.png`
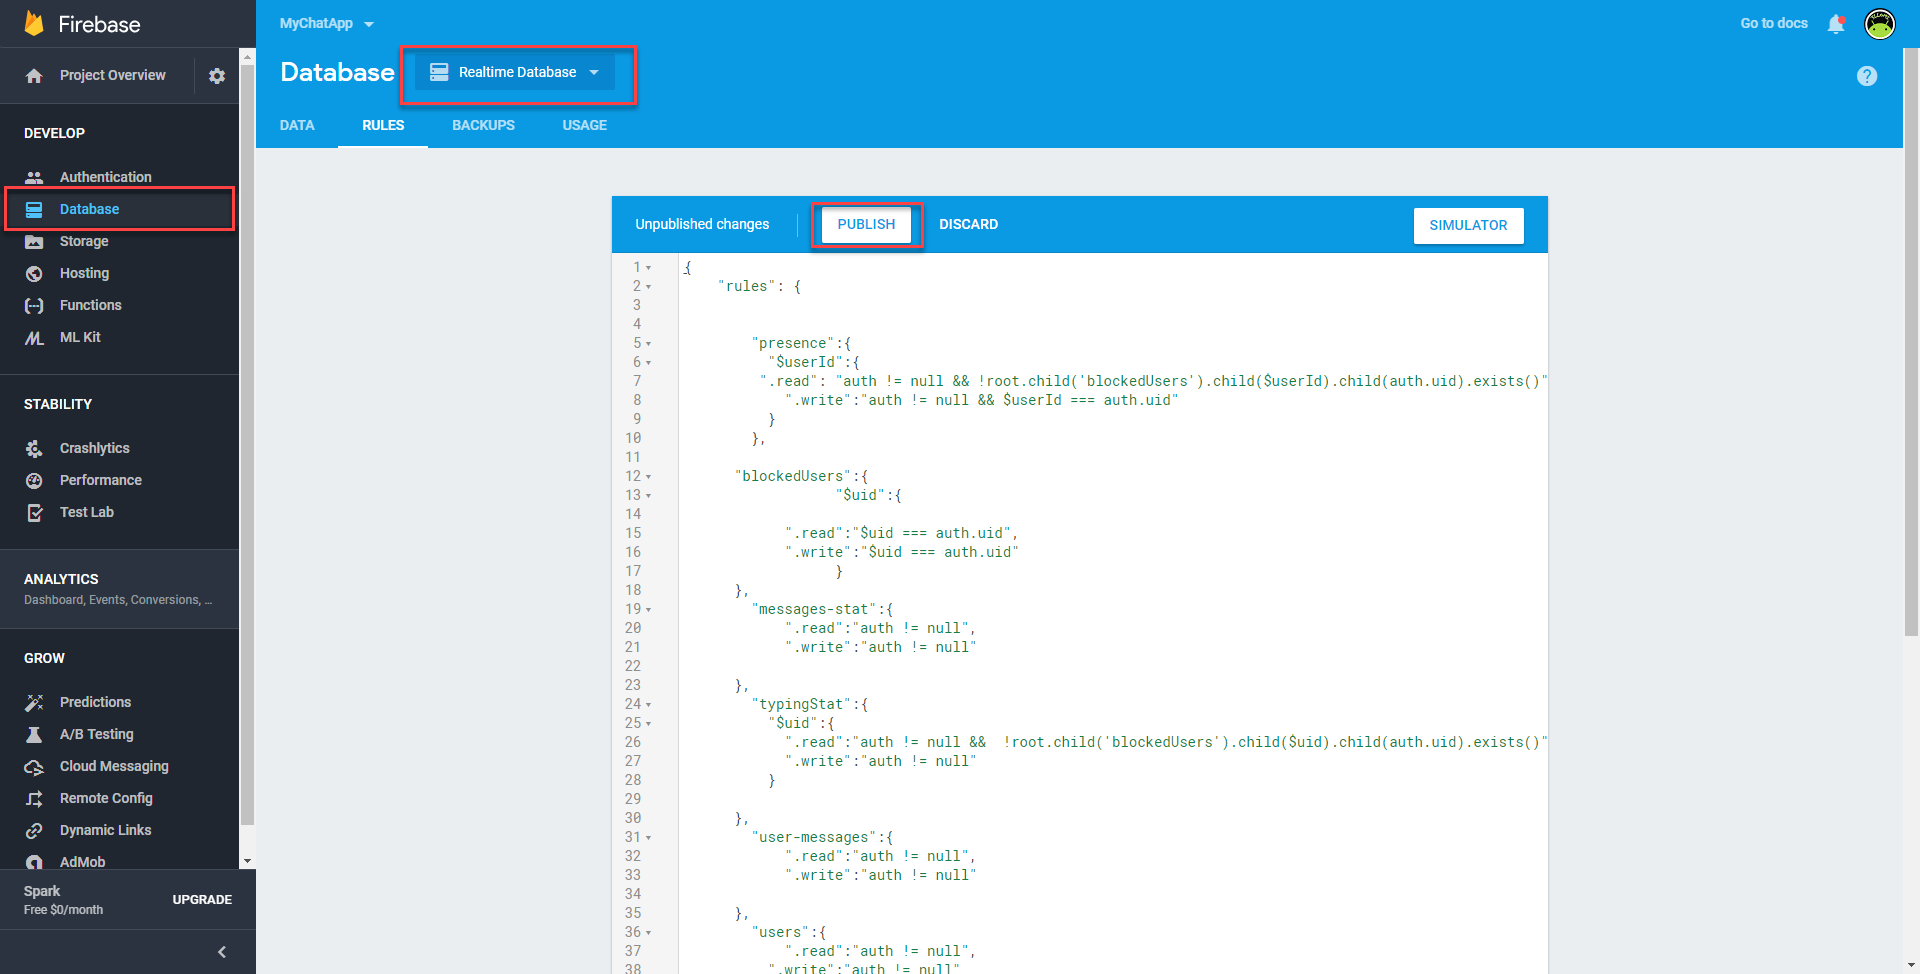
### Firebase Database Security Rules
go to 'Database' > Rules (choose Firebase Realtime Database if prompted)
now you have two options to secure your Database:
{% hint style="warning" %}
if you did not define Security rules the app will not work and you will face some issues while registering for the first time
{% endhint %}
**Secure Real Time Database**
go to Downloaded Files > Firebase Console - Files > and open up `Firebase-security-rules.txt` then copy all of its content and paste it in Firebase Rules
### Firebase Storage Security Rules
go to Storage > Rules and paste in the following rules then hit publish:
```javascript
service firebase.storage {
match /b/{bucket}/o {
match /{allPaths=**} {
allow read, write:if request.auth != null;
}
}
}
```
### Force Update Mode
starting SuperChat 3.0 we introduced **Force Update Mode** which forces the user to update the app on his device. to enable that go to Firebase Console > Database > create a new node by clicking on the little plus icon then add it like the following
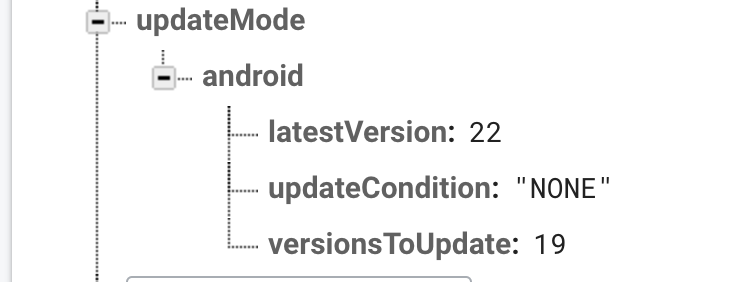
now let's explain these things:
* latestVersion: the latest version of the app, we use `versionCode` which is included in `build.gradle` file.
* versionsToUpdate: specifies which versions needed to update
* updateCondition: we use four conditions to check whether there is an update required
* `ONLY`: show the Force mode ONLY if versionsToUpdate == the client's current version
* `AND_ABOVE`: show the Force mode ONLY if versionsToUpdate >= the client's current version
* `AND_BELOW`: show the Force mode ONLY if versionsToUpdate <= the client's current version
* `NONE`: this is a kill switch if something goes wrong you can set `NONE` so you can disable update mode for the clients.
please make sure to type the conditions EXACTLY as above as it is case-sensitive.
### Connect with Firebase project
* Click on Add App on your Firebase project settings
* Select Android icon
* Copy the applicationId from your build.gradle and paste it as Android Package Name
* Click on Register App > Next
* click on Download `google-services.json`. it will download a `.json` file we will use it later
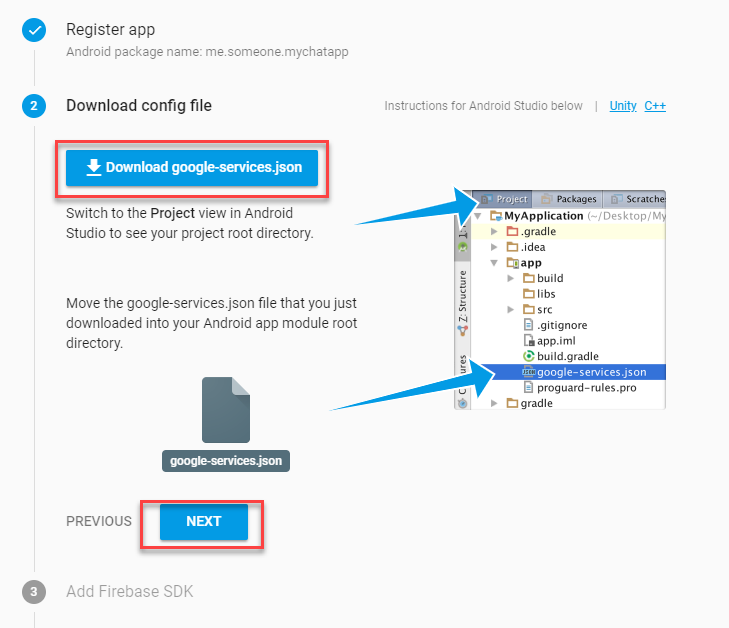
* Next, copy the downloaded `google-services.json` and paste it in the path `SuperChat - SuperChat_Code\app\` to make sure that your app is linked with your Firebase Project


